![]()
![]()
![]()
![]()
![]()
![]()
![]()
![]()
![]()
![]()
![]()
![]()
![]()
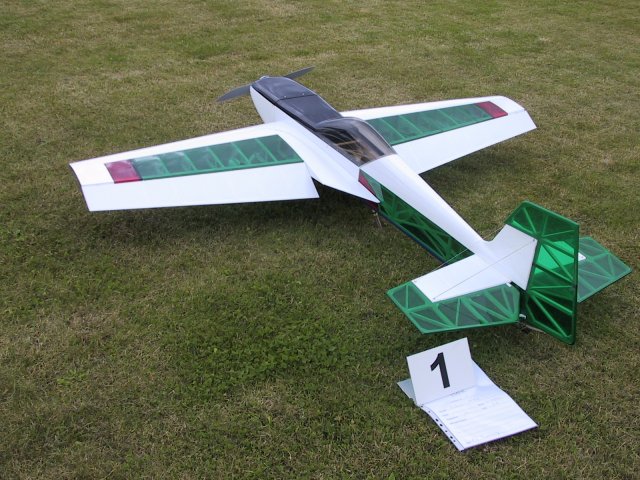
Funtana S
The combined Scale/F3A/3-D model designed by Sebastiano Silvestri did look interesting when he sent me some pictures of his own. When the price and kit-design (from Exclusive modelbau) became evident to me, the temptation was simply to big to suppress. Money was transferred, and after a couple of weeks a not too big box emerged. I had to complete most of my new Alliance (serious F3A) first, so the kit rested for about a week before building was initiated. Most parts are CNC-milled and together they form a very rigid construction. The number of parts are not excessive so assembly of major parts are fast.
Oct. 2003, Phoenix : After a long time (15-16 months) in sick-bay with no treatment I finally got inspiration to fix the Funtana again. It was a puzzle to reconstruct some parts, as not all parts are shown 1:1 on the drawings. I made most of the parts involving the firewall and engine mount-box new. It all came together quite nicely and the flying characteristics are just as good as I remembered them. The weight are about the same and it's SOO COOL to hover at 1/4-1/3 throttle. :-)
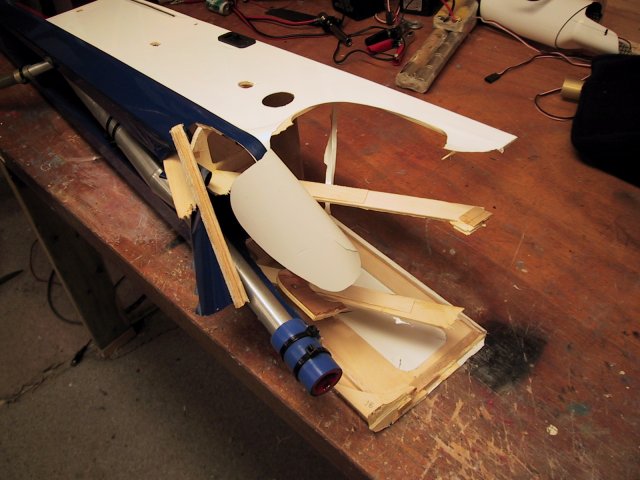
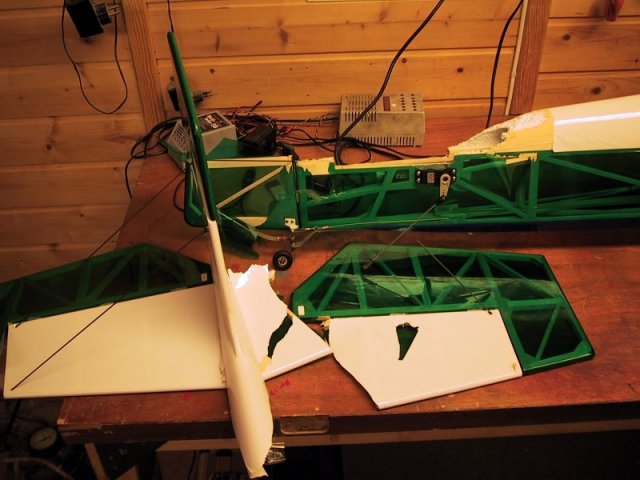
Chrash again.
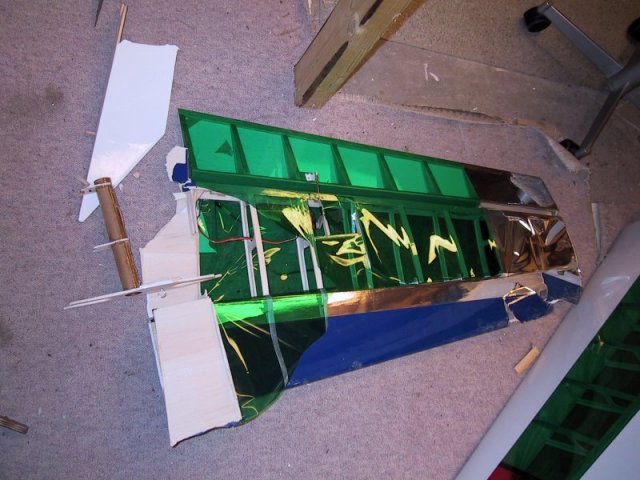
The local club hosted a scale fly-in 29-30 June 2002. Since I was preset and responsible for transmitter impound, I brought the Funtana (I called it a Katana T30 for the occasion :-) ) and made a couple of show-off flights. After the event on Sunday i made another, and suddenly there was contact between the Funtana and a Zen 50 pattern model of a club friend. The nose fell of the plane and without the engine the rest fell like a leaf to the ground. Investigation afterwards indicates that the Zen (coming down in a loop) hit the spinner of the Funtana. The nose with engine, gear and cowl got broken off, the rest is virtually undamaged. Since the damage is limited to the nose, it will be repaired, but when ?? The pictures below focus on the damaged parts.
Latest flying
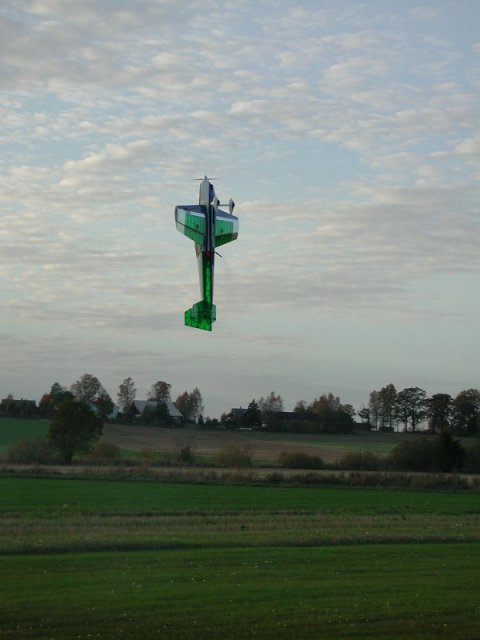
As with other 3D fun-flyers a low-pitch prop is best. To try other props than the APC 18x10 used from the beginning, I bought one APC 18x8W and one 19x8W. The 18x8W was tested first, the OS 140RX found it to be a very light load, and the sound in flight was just not the way I prefer it. The 19x8W was next, still some tip-noise when flying straight at full power, which is not done very often. In hover it's fantastic, the OS just purrr's at well below half in hover. It's much easier to reduce power and back down while keeping full control. When full power is applied from hover, acceleration is impressive and speed to start rolling and/or snap-rolling vertically is achieved after a short time. Quite impressive when the 4.7kg weight is taken into consideration. The OS pulls the prop at about 7300 static (no pipe, just the old and trusty JEX-muffler).
I do not give up that easy
You probably have experienced the same after a mishap. Everything looks terrible, one has the urge to shove it all into the waste-bin. Let it rest for a couple of days, then inspect, and big-surprise; it's not as bad as the first impression. A busy week with CA and Monocote fixed most of the Funtana. The cowl is not a pretty sight, but a new one is ordered. I do not believe the repair added too much weight, anyhow it still flies great. For extra safety the stab is supported both to the fin an to the bottom of the fuselage, I do not want it to fall off again.

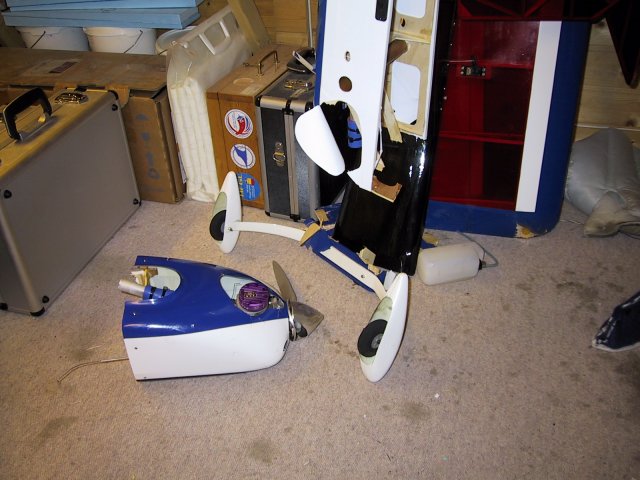
Success, then disaster, October 2001.
When the F3A-season is completed, it's time for 3D and other entertaining flying. Tuning of throws, change from older JR 4000 and JR 7100 super-servos to HD-DS8411's helped a lot, and I had a ball for a few weeks. Hovering was getting better all the time, new tricks learned and some F3A P03 schedules was flown. Then disaster struck. I had completed a P03-schedule, and was fooling around, doing snaps from knife-edge. Suddenly the whole tail-assembly falls off the airplane, and I'm totally out of control. It hits relatively slow in the autumn-wet farmlands, but the fragile structure has no chance. One wing is undamaged, the other one can be repaired. The fuselage, cowl wing tube .... is beyond repair. For later, I will add support-struts from the stab down to the bottom of the fuselage in addition to the ones up to the vertical fin.
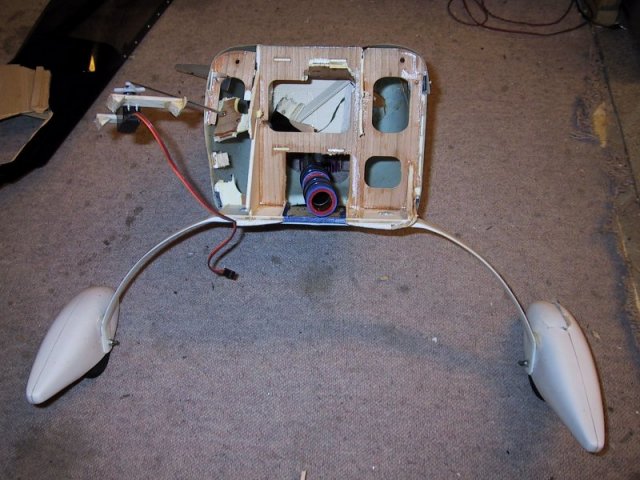
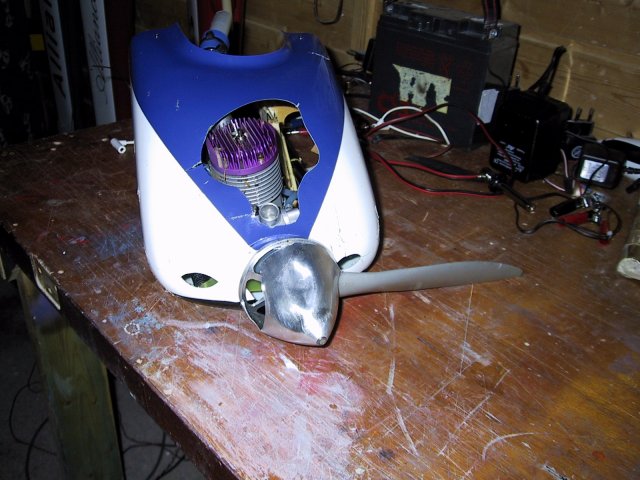
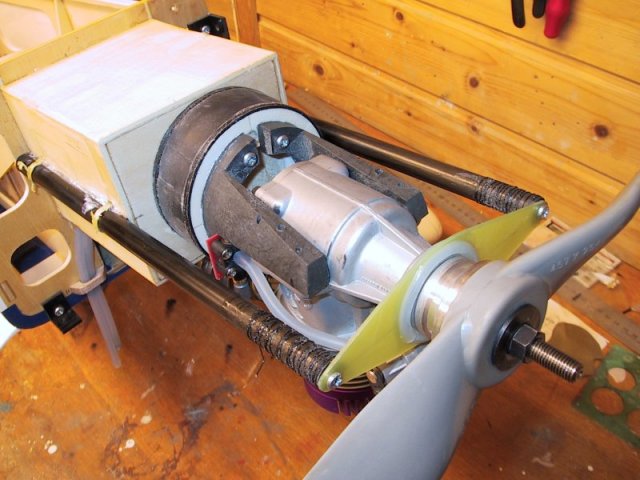
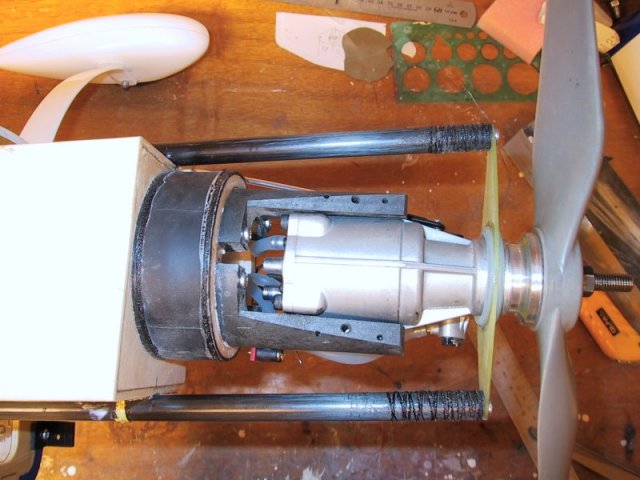
The new engine-mount, June 2001.
The first flights proved that the fast-and-simple engine-mount was terrible. Before any more flying it had to be changed, preferably to a Hyde-type with a nose-ring. The nose-ring ain't easy with a light detachable engine-cowl. The solution in the pictures below ended up quite well.
The day of proof, 14 April 2001.
The first few flights were done on the afternoon of Friday 14. April. It was windy and cold, but the flights was successful and trimming is started. Some problems with rattling of the engine-cowl generated a nasty noise. Something must be done with the engine-mount to reduce the vibration, before further flights. In spite of this I did get a positive impression of the model. Very good and accurate feel of aileron response, probably due to the extremely light wings. It did have some coupling from rudder to ailerons, and it pull a bit towards the belly in knife edge, not much but enough for me to set up two mixers on the radio. The OS 140RX pulling a APC 18x10 gave plenty of power to enable brisk acceleration from hover. A more detailed report will follow after proper trimming and tuning of flight-performance.
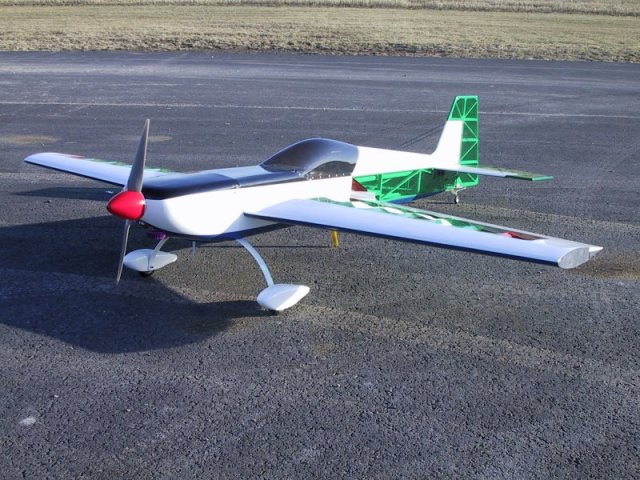 Finally
ready on a windy afternoon.
Finally
ready on a windy afternoon.
 I
think that transparent Monocote is a must on a model of this kind.
I
think that transparent Monocote is a must on a model of this kind.
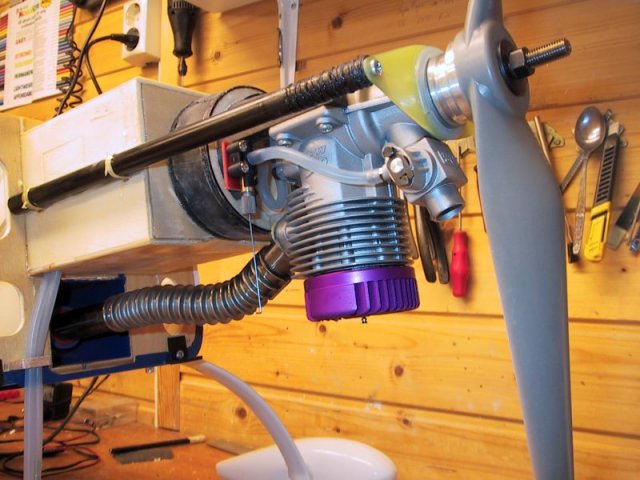
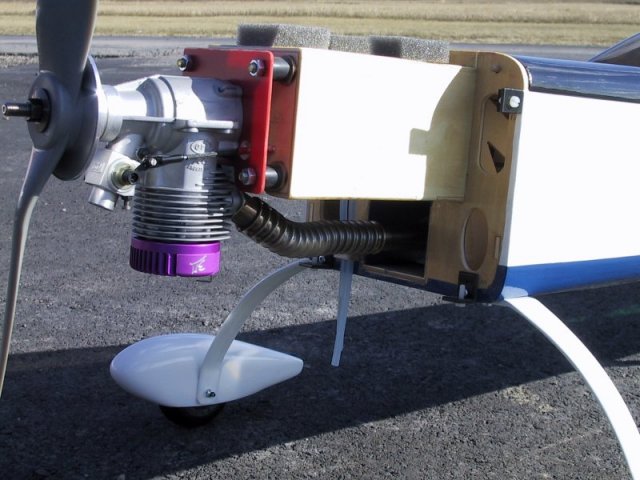 OS
140RX for power, with a JEX muffler and APC 18x10 propeller. The simple
soft-mount is inferior to a Hyde-mount, but easier to implement.
OS
140RX for power, with a JEX muffler and APC 18x10 propeller. The simple
soft-mount is inferior to a Hyde-mount, but easier to implement.
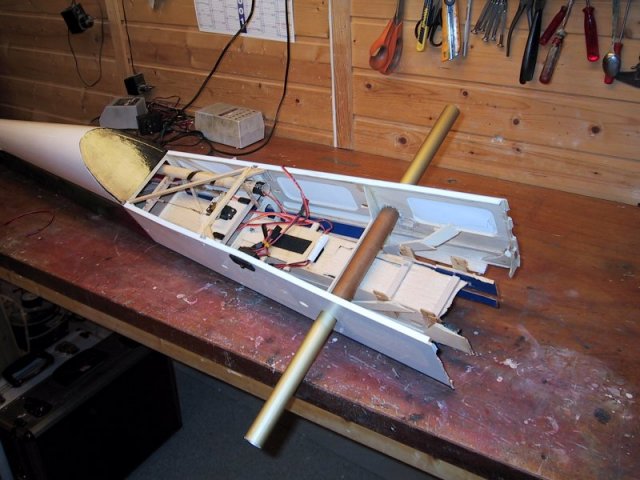
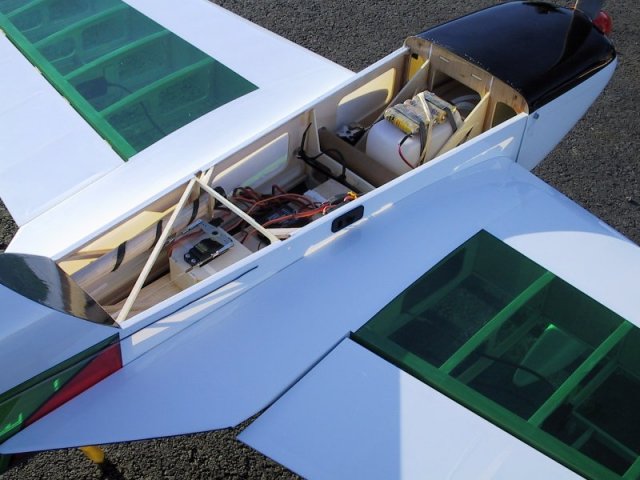 Rudder
(JR-DS8411) - and throttle-servo (JR-321) is up front together with receiver (JR
649S) and battery. The two elevator-servos (JR 4000) rests in the tail.
Rudder
(JR-DS8411) - and throttle-servo (JR-321) is up front together with receiver (JR
649S) and battery. The two elevator-servos (JR 4000) rests in the tail.
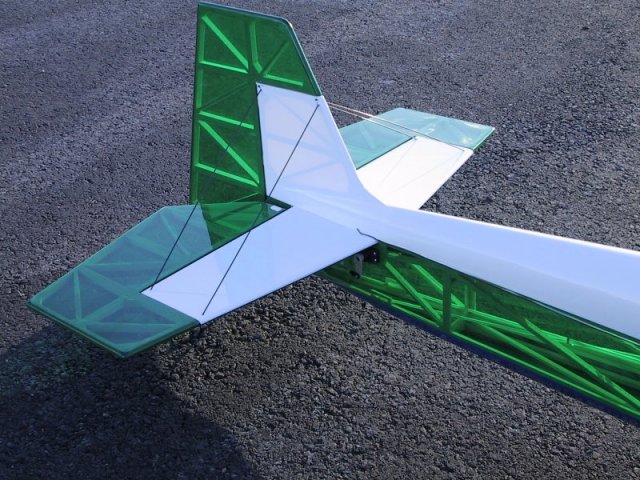 The
light tail is supported by carbon-rods from the fin.
The
light tail is supported by carbon-rods from the fin.
Status as of 25 Mar. 2001
Wings are done, different construction technique with carbon-tube as main-spars. Building is done over the drawings, with supplied kind-of jig to help getting a straight wing.
 Wing
is of lighter construction than one is used to. Spars are 4mm
carbon-tubes.
Wing
is of lighter construction than one is used to. Spars are 4mm
carbon-tubes.
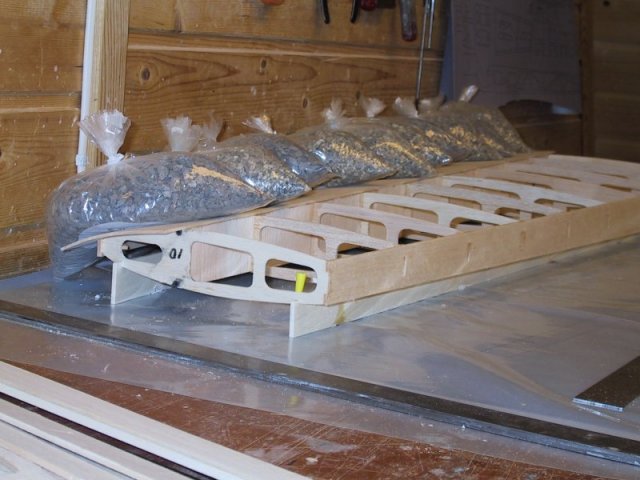 Sheeting,
to create the D-box is glued in place. Bags with sand used to force
sheeting in position.
Sheeting,
to create the D-box is glued in place. Bags with sand used to force
sheeting in position.
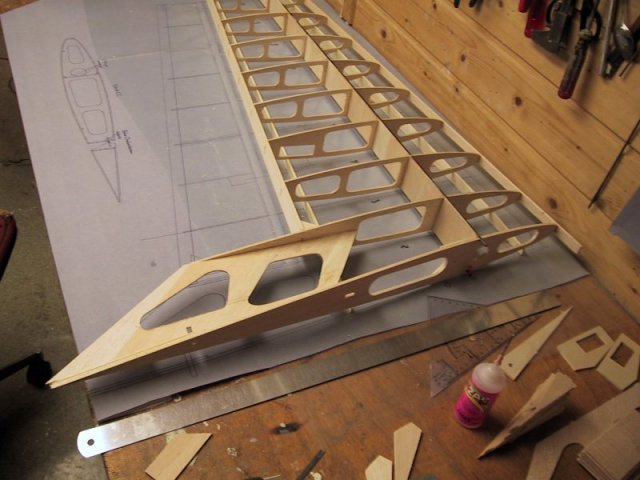
 First
side is sheeted. From this angle the carbon spars are visible together with the
sockets for the wing-tube.
First
side is sheeted. From this angle the carbon spars are visible together with the
sockets for the wing-tube.
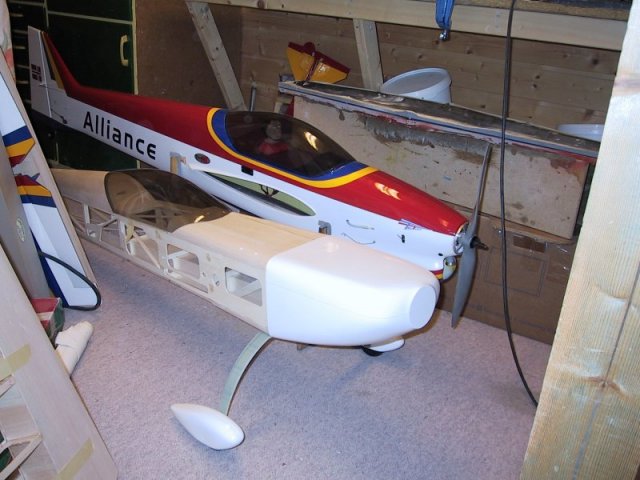 The
fuselage together with my new F3A-model, an Alliance from ZN-line.
The
fuselage together with my new F3A-model, an Alliance from ZN-line.
Status as of 16 Mar. 2001
After 3 evenings (10-15 hours) the fuselage including tail-feathers are done. Next up are the wings. Below are some pictures taken during the process, expect more to come as the project moves towards completion.
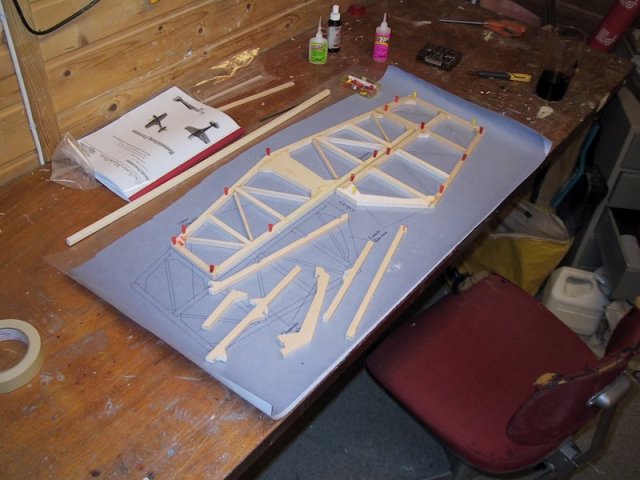
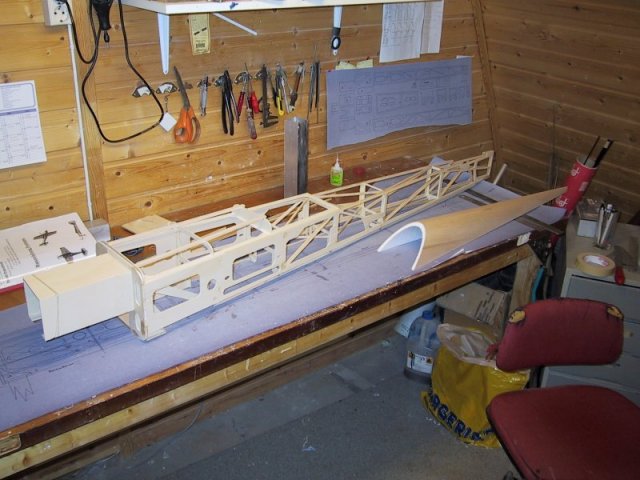 The
main 'box' of the fuselage is assembled, simple and strong construction.
The
main 'box' of the fuselage is assembled, simple and strong construction.
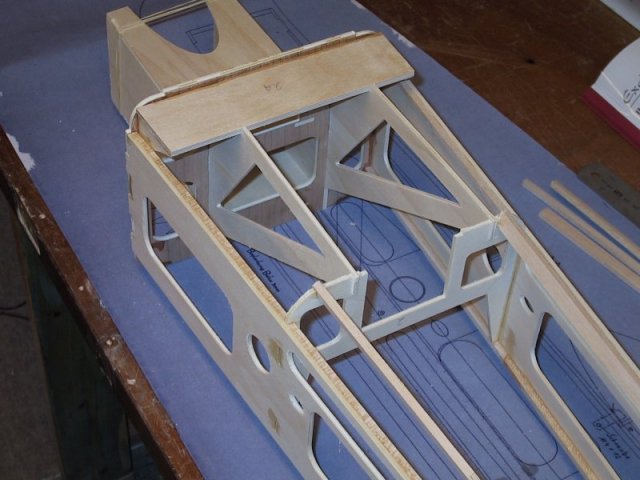 The
front of the fuselage. Notice that the engine-box continues all back to
F2, making a very rigid structure. The cutout in formers are for the
pipe-tunnel.
The
front of the fuselage. Notice that the engine-box continues all back to
F2, making a very rigid structure. The cutout in formers are for the
pipe-tunnel.
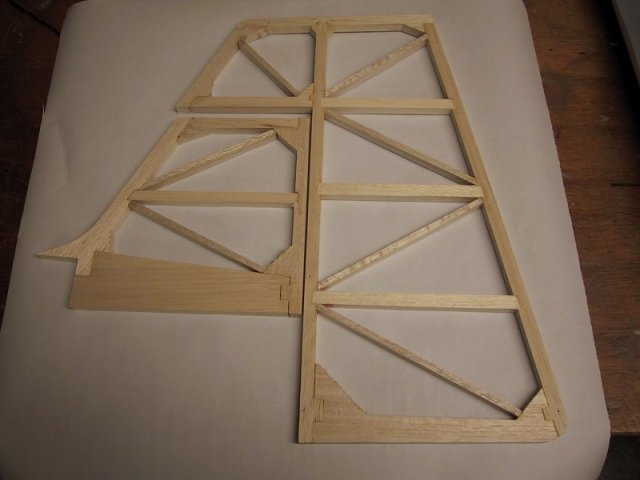 Fin
and rudder of 10mm thick balsa. As can be seen most parts are CNC-milled with
tabs for interlocking, very ingenious.
Fin
and rudder of 10mm thick balsa. As can be seen most parts are CNC-milled with
tabs for interlocking, very ingenious.
 Horizontal tail, build the same way as fin/rudder.
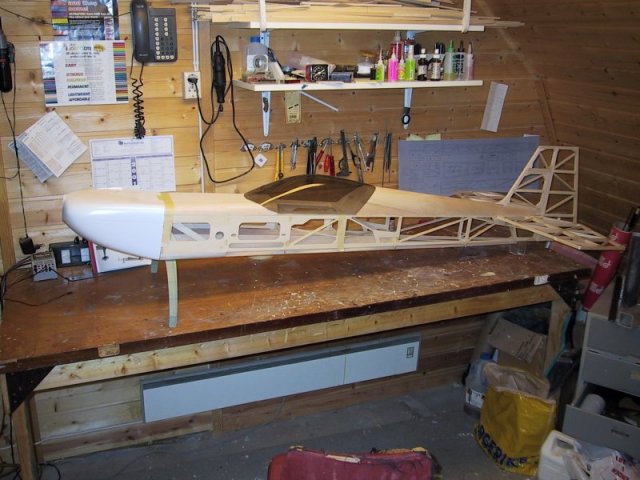 The
assembled fuselage with tail pinned in place, canopy, cowling and landing-gear.
The
assembled fuselage with tail pinned in place, canopy, cowling and landing-gear.